Please note: As a self-represented litigant, you must create a KYeCourts account and complete the eFiling Certification for Self-Represented Litigants before filing your first case. Once you have done so, follow the steps below to e-file your case.
Filing a Small Claims Case as a Self-Represented Litigant
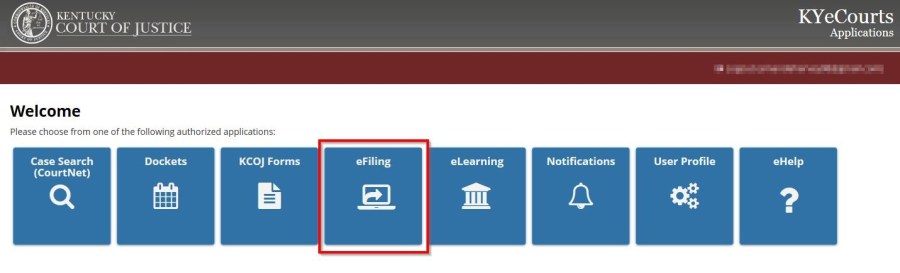
To begin a new case, click on the eFiling tile on your dashboard.
Click the eFile dropdown menu and select New Case.

After selecting New Case, you will be presented with a series of questions designed to help you choose the jurisdiction and case type for your filing.
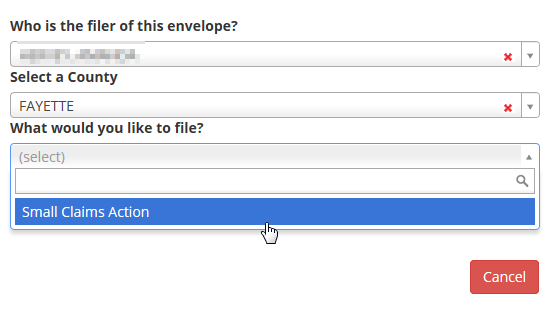
Select Small Claims Action as the type of case you wish to file then select the most appropriate option for the type of small claims filing. For instance, will you be filing a small claims contract, property damage case or personal injury case?

Once you have answered those questions, you will advance to the General Information screen. At the top of the screen, you will see a box that contains general information about the filing such as the envelope number. The presence of the envelope number indicates the filing now exists on your dashboard and you can edit its contents until you submit it to the court.
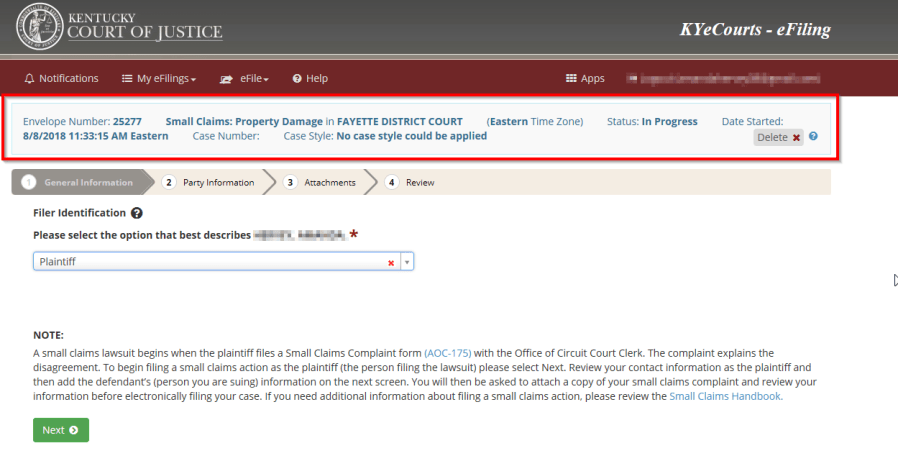
The delete button deletes the entire filing from your dashboard. You can only delete a filing before it is submitted to the court.

The navigation bar allows you to freely navigate between sections of your filing.
![]()
Under the General Information screen, you must identify yourself as the plaintiff or person filing the lawsuit. Hovering over the question mark will display help text.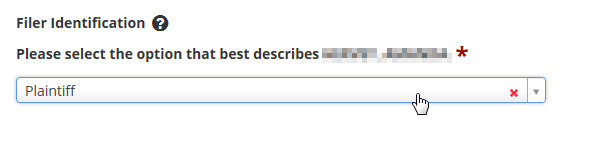
Each type of filing will have required fields that must be completed before you are allowed to submit your filing. To determine if there is a required field, examine the upper left-hand corner of your screen. There you will see a red box labeled mandatory that indicates what information is required.
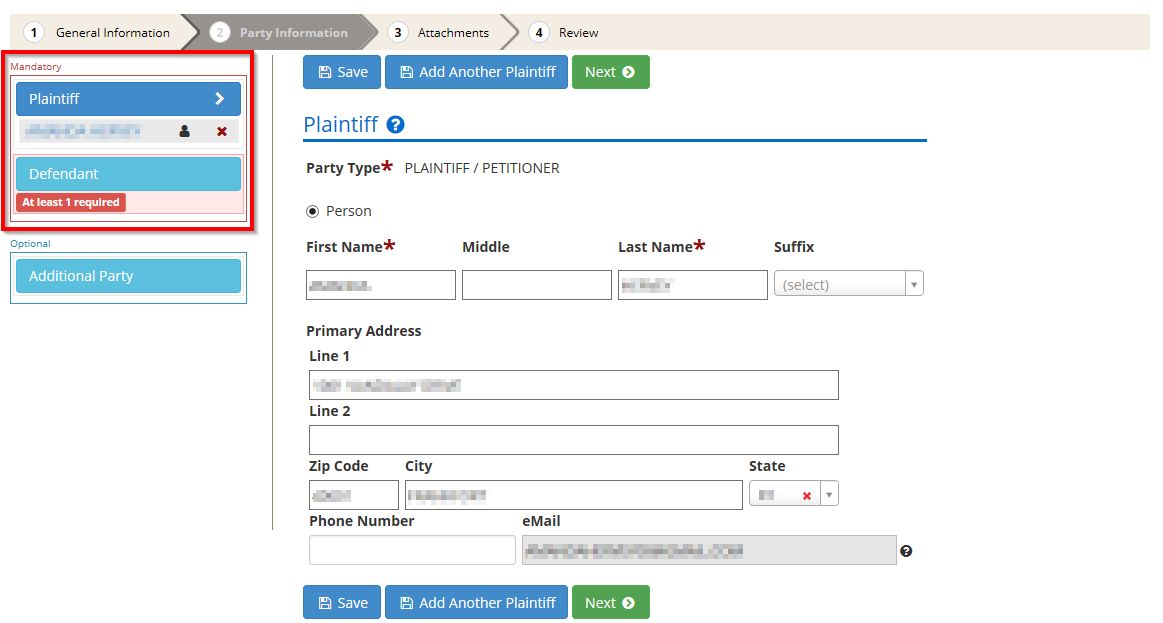 You may add a party type by selecting from the categories on the left side of your screen. You have the ability to add or modify parties at any time until the envelope is submitted to the court. Required fields are denoted with an asterisk. You must enter at least a first and last name in the required fields. All email and phone information is optional.
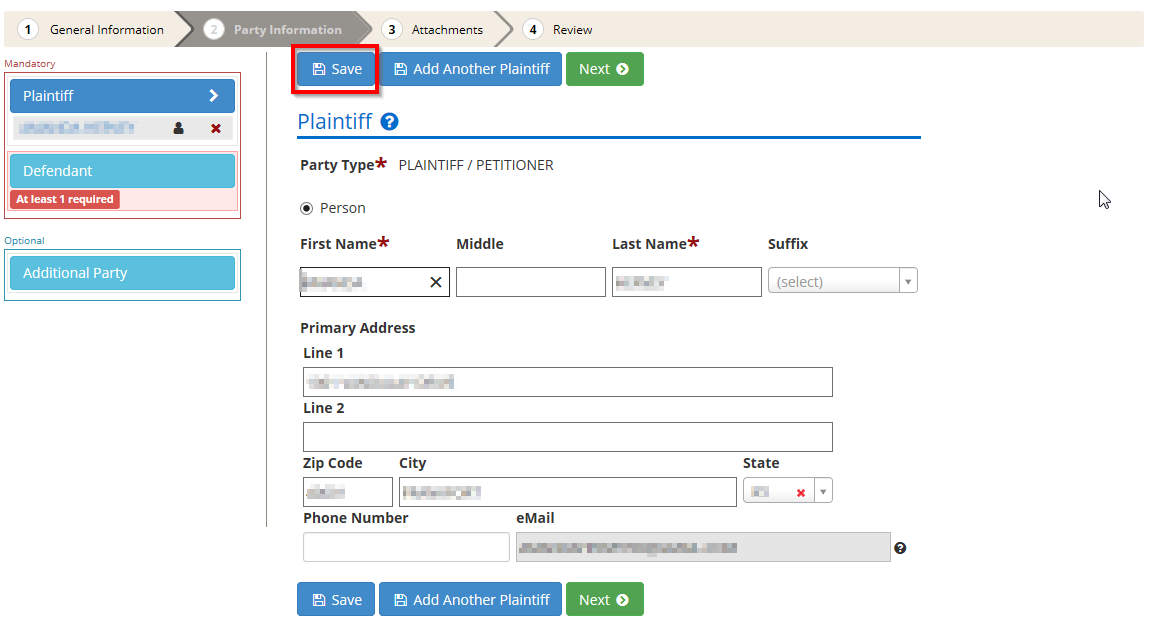
You may save party information by clicking the save button.
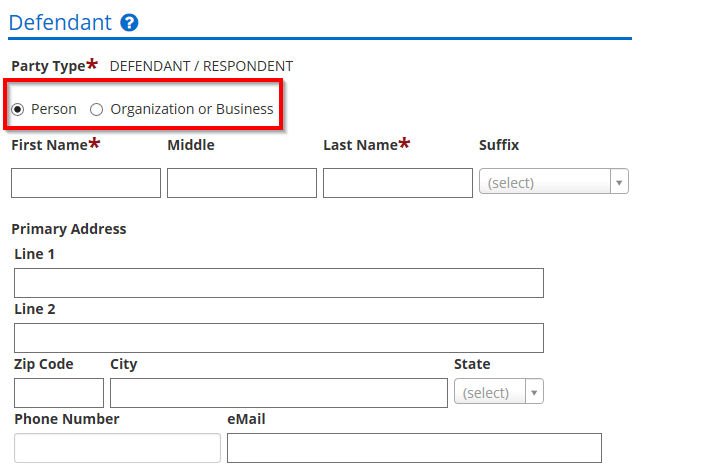
Under the Party Information screen, you will be required to enter the Defendant’s information. You will have the option of filing against a person, organization or business.
For Service of Process, you may select multiple and different service methods for each defendant. A summons will be generated by the circuit clerk based on the information you provide on the party information screen.
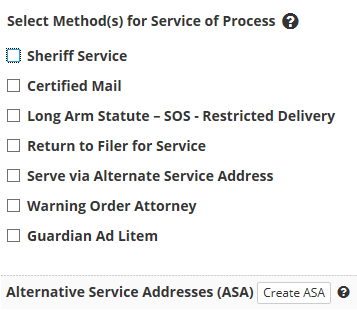
If you select Sheriff Service, you’ll need to select the appropriate sheriff’s office that will serve the defendant.

At the bottom of the party information screen, you will have the option of adding another defendant. If you add additional defendants and require sheriff service, you may select multiple counties if necessary under the Participating Sheriff Departments dropdown menu to issue service.
You will also have the option of adding an alternative service address if you wish for the defendant to receive a summons to appear in court at an additional address.

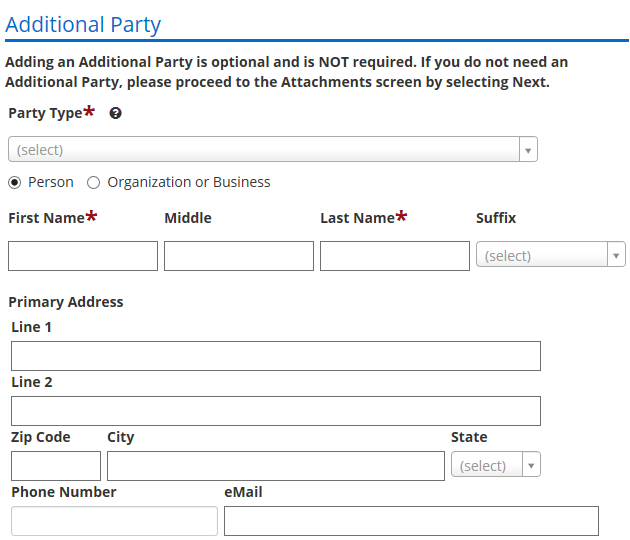
Any party types that do not fit into the displayed categories may be added under the additional parties category. You may add as many parties as needed to complete your filing. Once you have included all the parties necessary to your case, proceed to the attachment screen by clicking next.
In order to submit your envelope to the court, you must attach a file for each mandatory item located in the red box on the left side of the screen. An envelope may not exceed 50 megabytes and each individual file may not exceed 4 megabytes. The Small Claims Handbook is accessible to the left for your convenience.
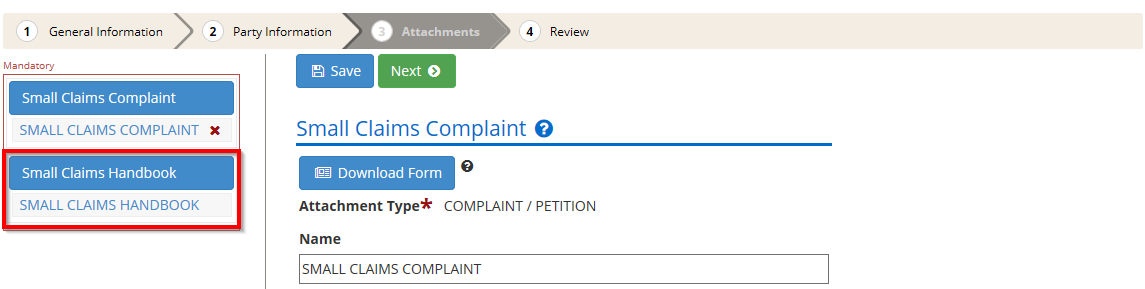
As the plaintiff, you will be required to file a Small Claims Complaint (AOC-175). The complaint explains the disagreement. Click the Download Form button on the Attachments screen to download and print the form.

Once you have completed the form, scan the document and save it to your computer. Next, click the Select PDF File button and upload your form.
Once uploaded, each attachment will display a link that will allow you to open the attachment in order to ensure it is complete, legible and not corrupt.
If the file size is zero, then the file is probably corrupted. If this occurs, you should recreate and replace the corrupted file.
The Review screen allows you to double-check your filing before submitting it to the court. If your filing is incomplete or contains errors, a red message will be displayed at the top of the page. You must correct all errors before you are allowed to advance past the review screen. An Edit Icon at the end of the message will allow you to navigate directly to the portion that contains the error.

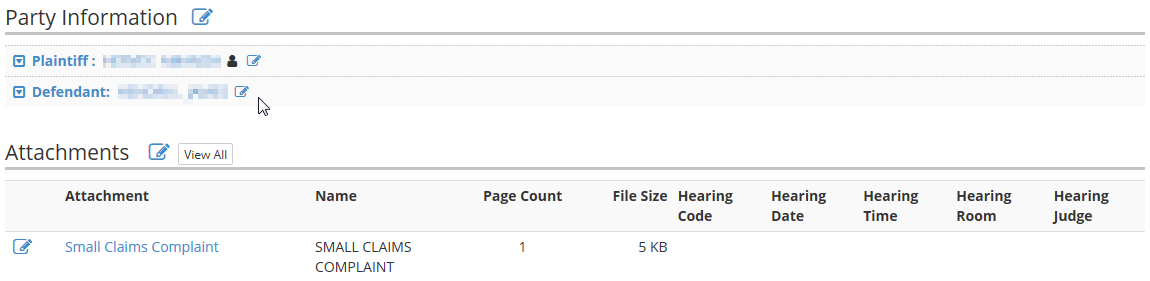
The Review screen allows you to review all the information before submitting the envelope to the clerk. Here you can see all information for the party, including any service method selected. You may also review any attachment. To review the attachment, click the attachment.
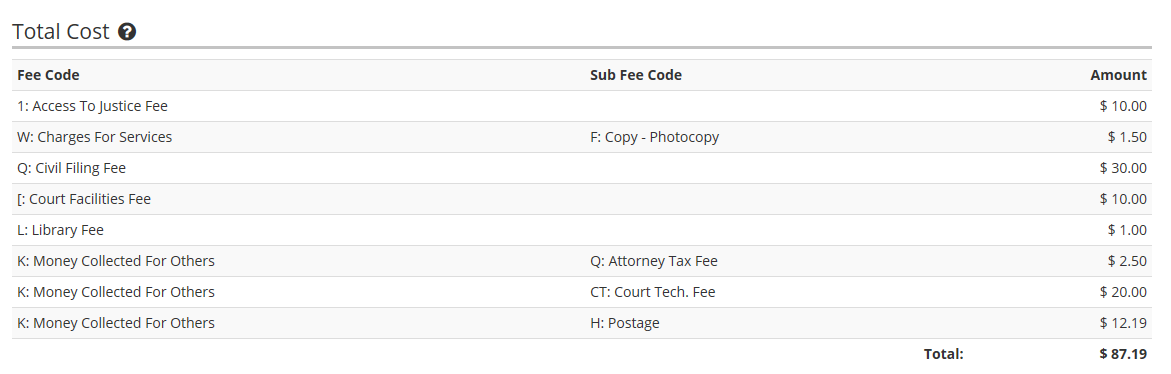
 Finally, if there are costs associated with your filing, those costs are displayed on the Review screen. You’ll receive an itemized receipt for your records.
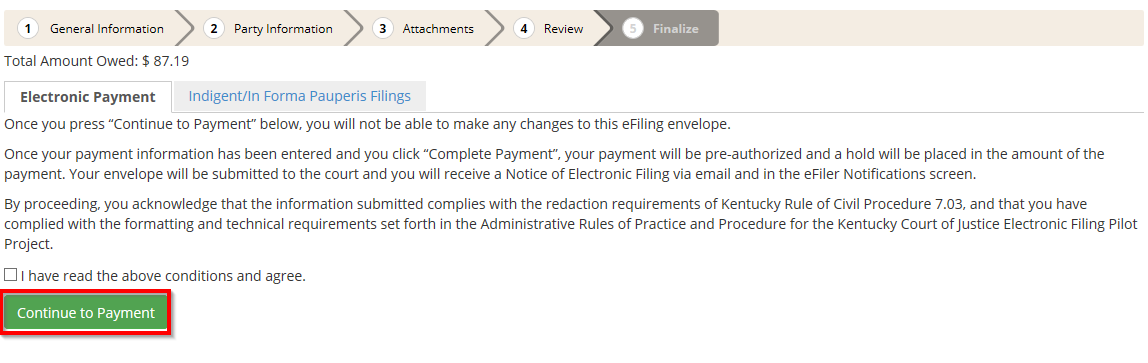
 On the Finalize screen, you will click the green Continue to Payment button if you are ready to submit your filing. You will not be able to make any changes to your envelope once you have clicked Continue to Payment.
You may submit a motion to proceed In Forma Pauperis. Once you upload the appropriate In Forma Pauperis paperwork, the court will determine your eligibility to proceed In Forma Pauperis. If you are ineligible, you will be required to pay for the filing.
Once you have clicked the Continue to Payment button, you will be taken to the payment screen. Enter your billing information and click Pay Now. When your payment is complete, your filing is submitted to the court and you will receive a notice of electronic filing.